In my trip to Iceland during winter 2017, I brought my new camera (Sony A6000) and lens (Samyang 12mm f2.0) along for the trip, hoping to capture some nice photographs of the sky. This post documents my first attempt at it and key learning points for someone wanting to do the same.
The story
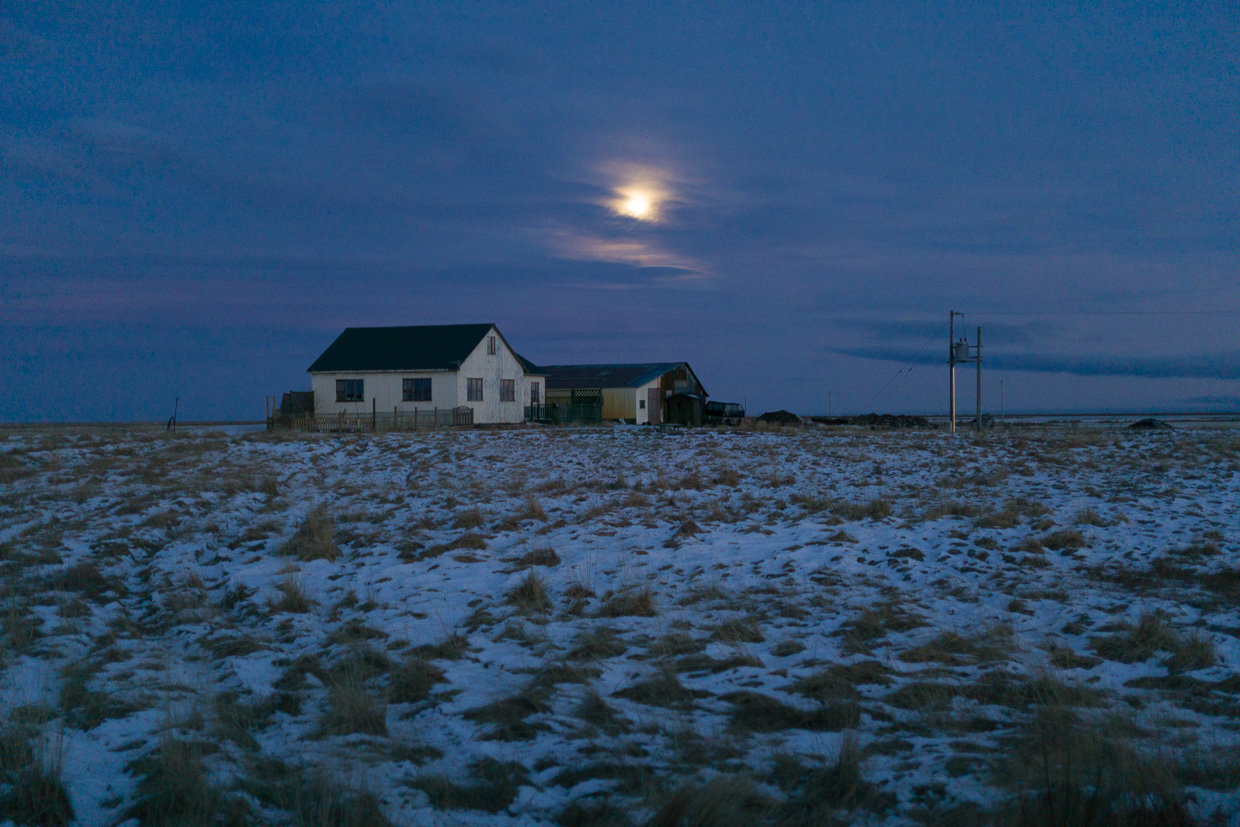
On our second night out in a secluded cabin east of Vik, we decided to capture the stars. After dinner, we set up our tripods outside, keyed in the settings and took our shots.
The kp-index that day was low, so we weren’t looking for the aurora. However, pointing my camera north and taking a few timelapse photos, I was rather convinced that the marginally moving green tinge in my picture was the aurora. My mates were less convinced.
The next night, armed with the knowledge of how aurora sighting works and the various forecasts websites, I was hopeful we could see something for the whole evening. The kp-index forecast was 4 - 5 until 12am.
At 9pm, we were disappointed because the aurora wasn’t strong. One would need a couple glasses of wine, or hallucinogens, to say one could see anything in the sky. The cameras did capture some visible green tinge but not enough to be excited over.
My mates decided to go to bed first and try again later. I set an alarm for 12:30am when it was forecasted to be high again, and went to bed as well.
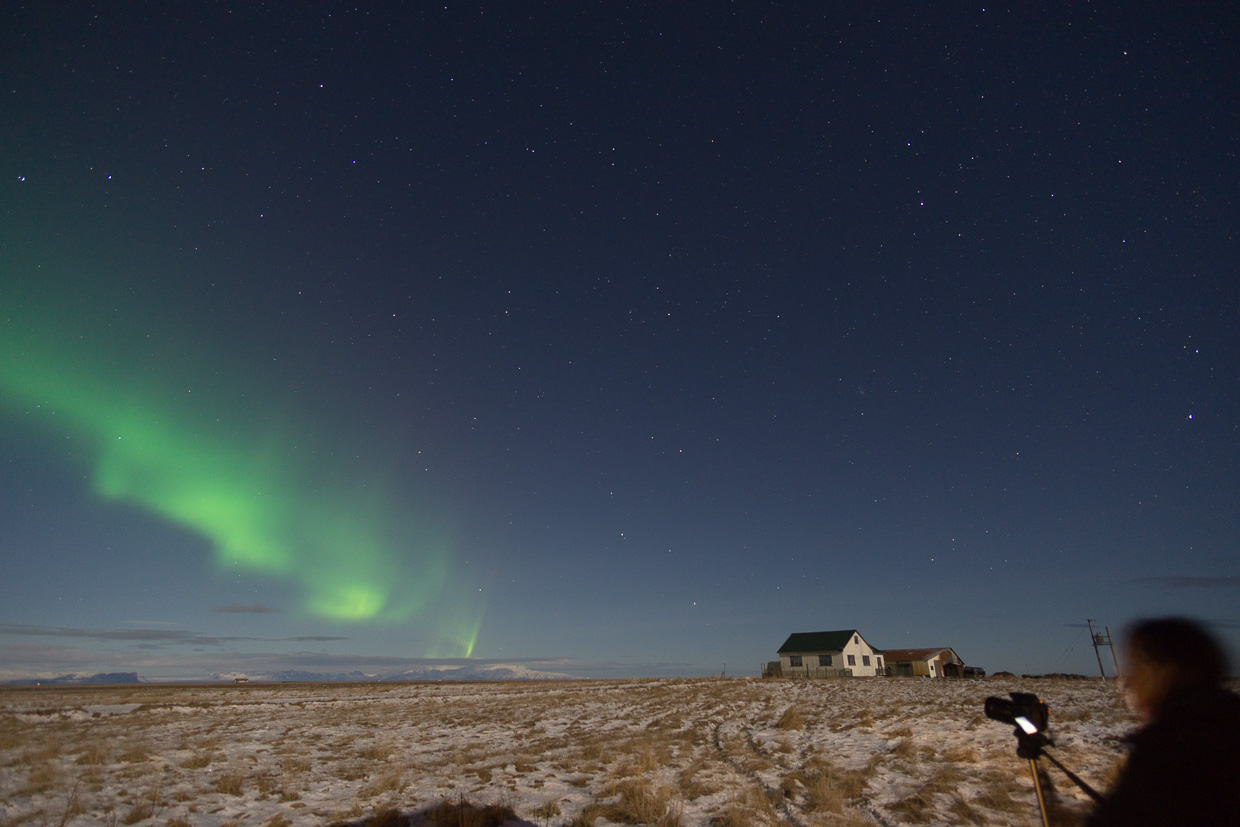
When my alarm went off, I grudgingly dragged myself out of my bed, navigated down the stairs, tip-toed to the nearest window and peered out. I saw a long circular band of what looked like clouds and did a double take. I have never seen clouds like that so I woke another mate up to get a second opinion.
Once we were both convinced it could be the aurora, we woke the rest up, and we all started taking pictures.
At first sight, the aurora looks like clouds in the dark sky. Perhaps that is what it looks like when it is not that strong. It did “dance”, not like tango, but more like a slow waltz.
The next day, we saw pictures on instagram where the aurora looked insanely strong in a different part of Iceland. I really wonder if it looks green to the naked eye.
That night, we planned to go hunting, but there was so much clouds that despite it being a full moon, we could not even see the moon. We gave up, the aurora clearly doesn’t want to see us again.
The lessons
1) Manage expectations
What the camera captured was very different from reality, especially under low light scenarios. Settings play a very important role when capturing these shots and there were a lot of trial and error involved.
However, the camera usually capture the scene better than it appears to the human eye. While it can be somewhat disappointing in real life, one can still get all the likes from social media!
2) Do research, follow predecessors
Astrophotography has a long histroy so it is useful to see what others have done in the past. Youtube is a great place for learning about what others have tried. After watching the following videos, I had a pretty good idea what equipments and settings I needed before going on the trip. Take note of the settings used and bookmark the links that were helpful to you.
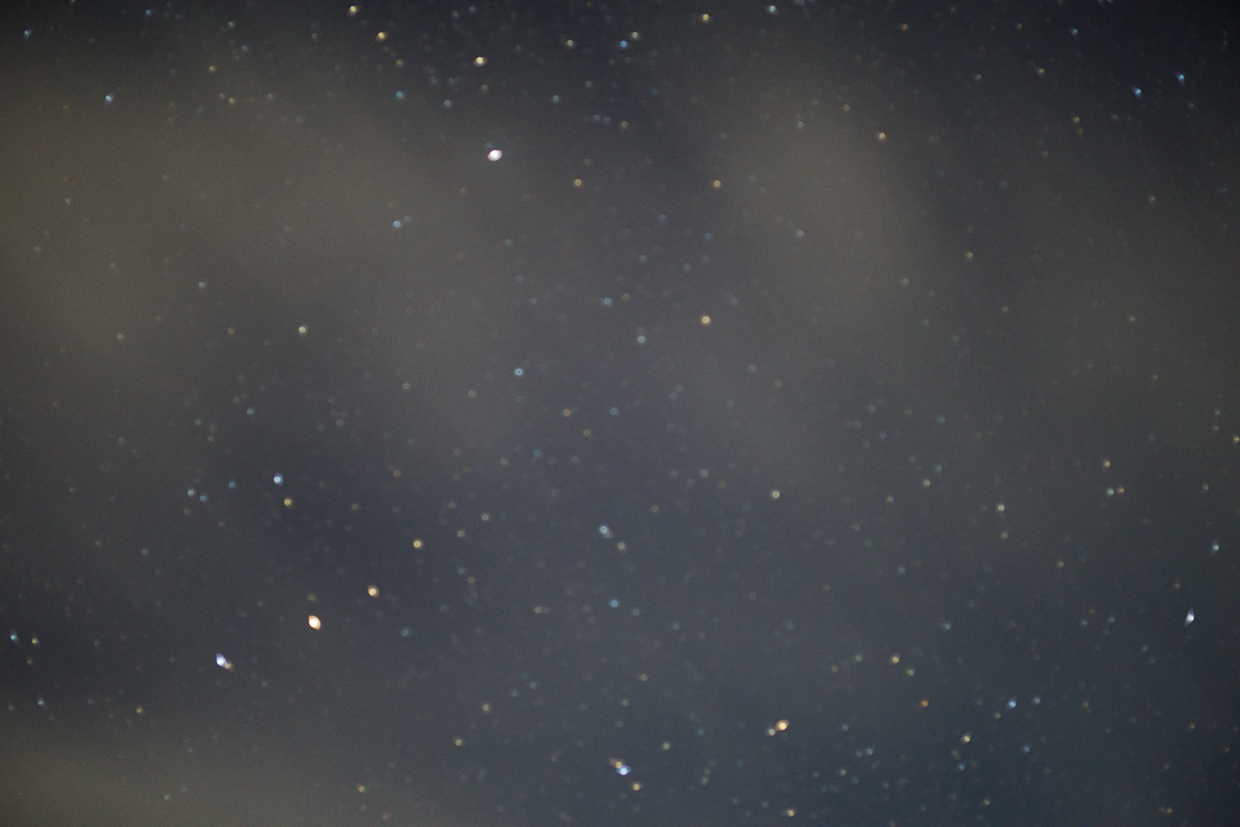
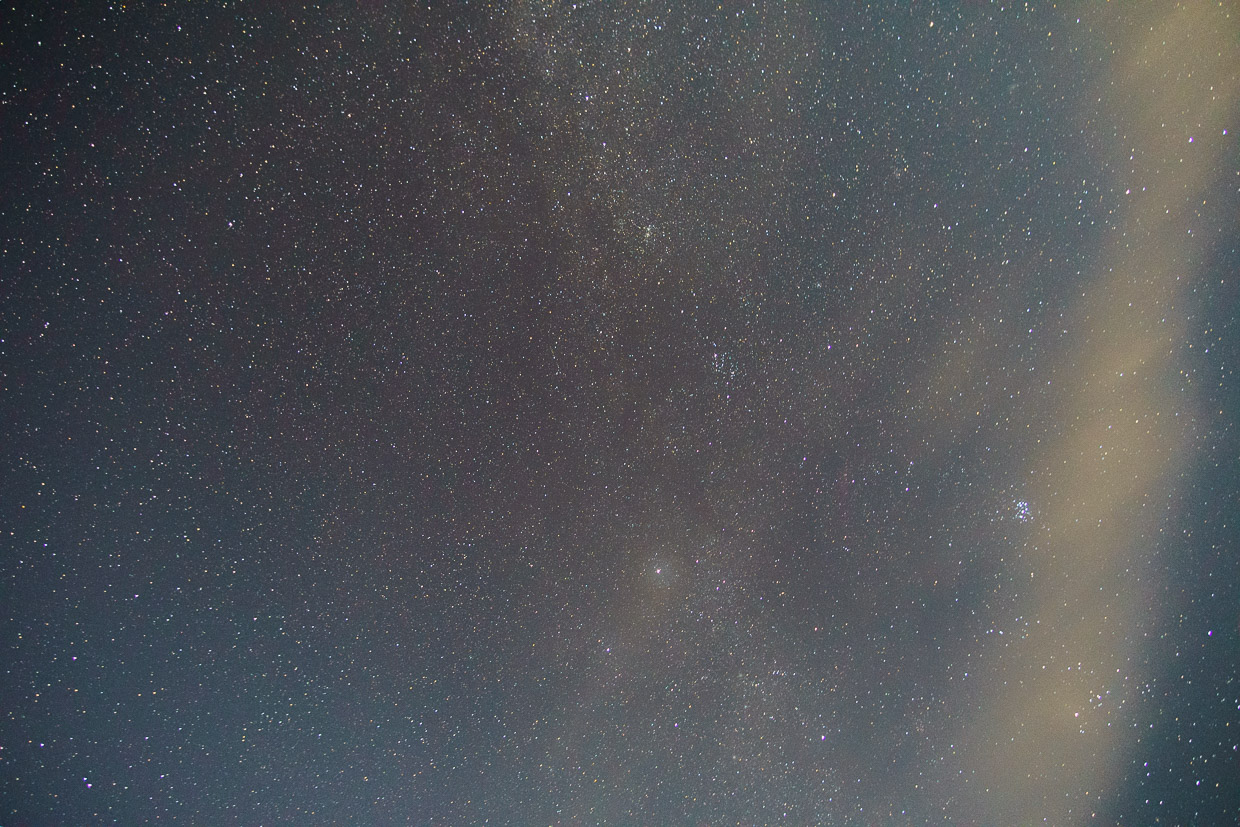
3) Focus to infinity
Make sure your camera is set to manual focus, with focus distance of infinity or a few mm before infinity.
Without focus:
With focus:
4) Beware of other light sources
Be weary of other light sources that can cause flaring in the image. Chances are you won’t be the only want in the group taking pictures. Make sure other people don’t accidentally shine light at the lens.
Unwanted flare can also come up if the picture is taken during twilight. It is the period when the sun is below the horizon but there is still natural light. While it is hard to detect with the human eye, a camera with long shutter will definitely be able to capture it. So learn about the different twilight and make sure to take photographs after twilight to avoid unwanted light.
Of course, also make sure people don’t walk into your frame.
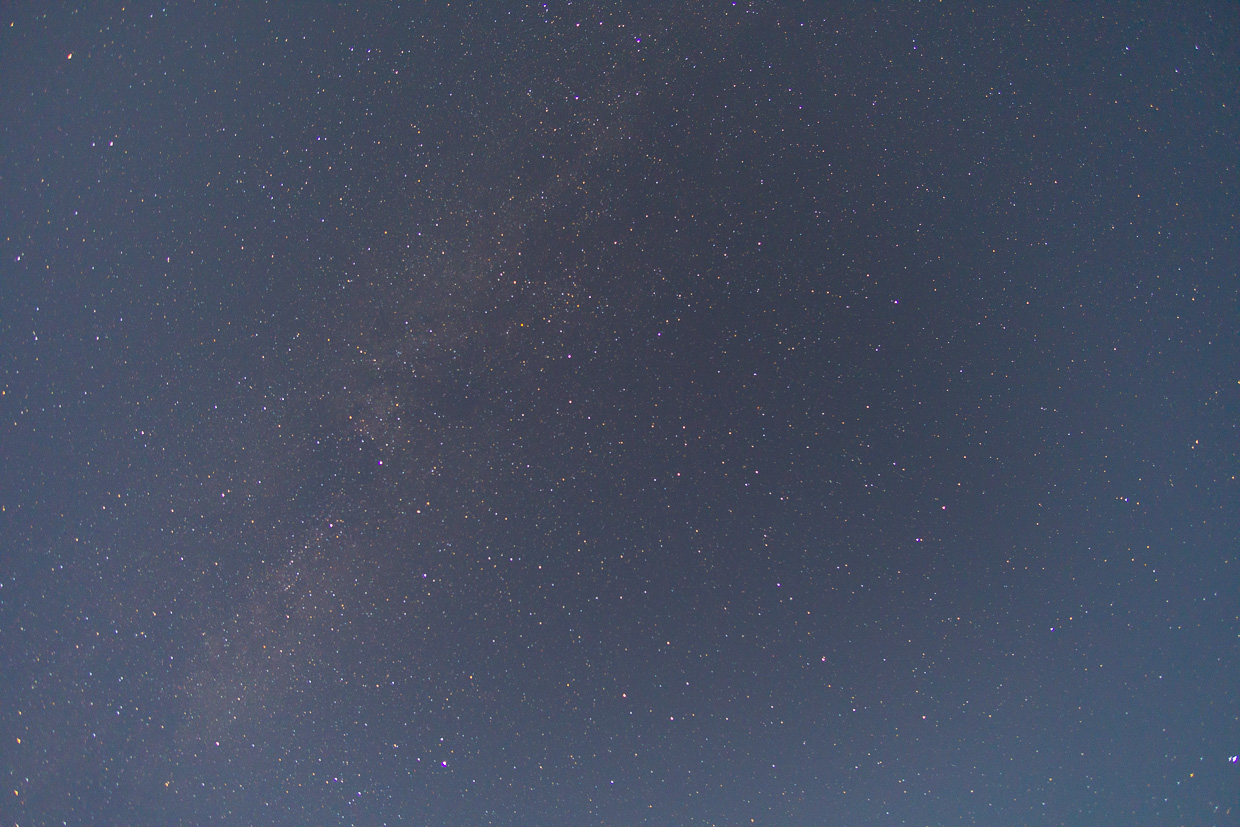
Stars and the milky way
The key to capturing the stars and the milky way is to find somewhere with little light pollution (away from cities) and wait for a clear sky without clouds.
5) Long shutter with high ISO
- High ISO, > 3200 (I also tried 1600 when the picture is too bright)
- Largest apature the lens can support (< f2.0)
- Long shutter. The rule is to derive the number by taking 500 divided by the 35mm effective focal length. E.g. if my lens is 12mm, it’s 35mm equivalent is 18mm, so I should set the shutter to 500/18 = 28s.
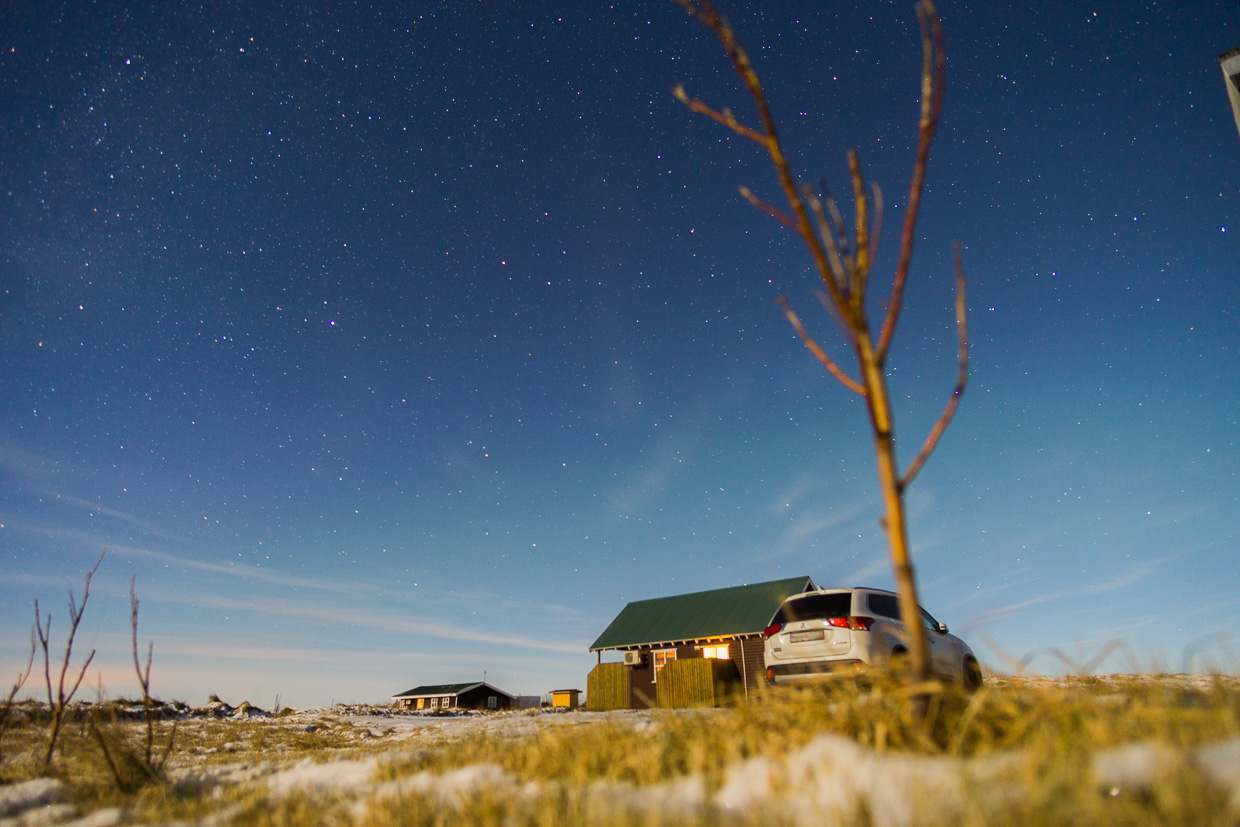
6) Pay attention to the lunar phase
A full moon will limit the angle in which you can capture the milky way from. We went there when it was very close to full moon, which somewhat limited the portion of the sky I could capture.
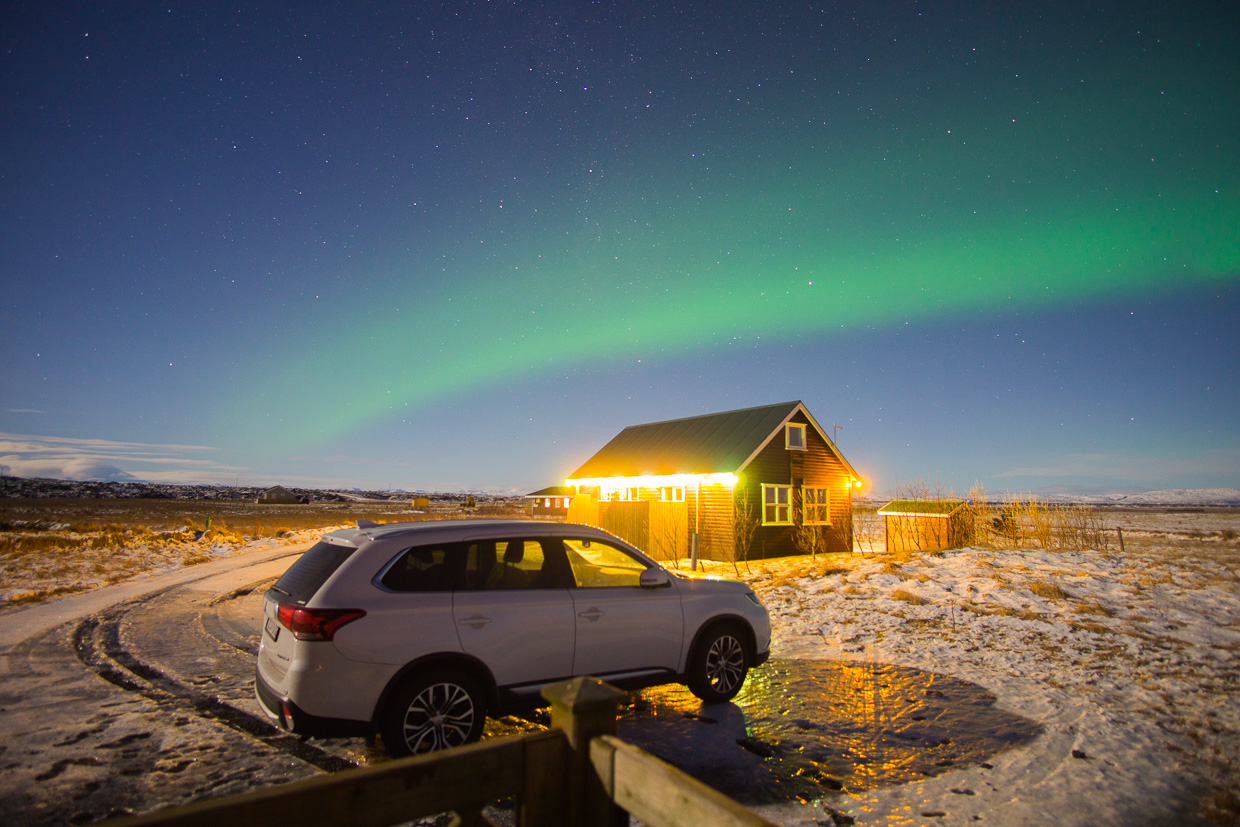
Aurora, Northern lights
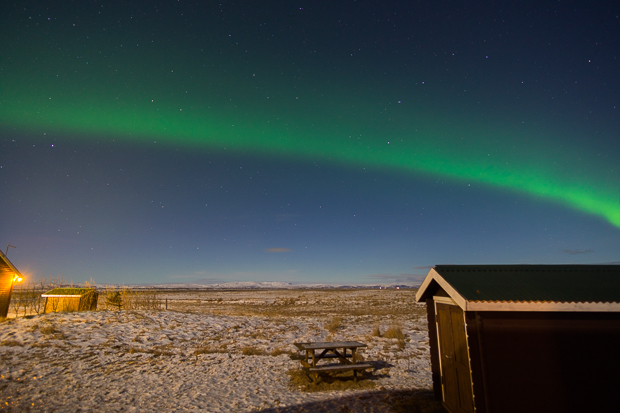
Unless the light is very strong, it may look like clouds to the naked eyes. Cameras can definitely “see” the aurora better than the human eye can. If you don’t know what to look out for, you may not realize you might be looking at the aurora. At the same time, if you’re too keen on seeing lights, you might see lights everywhere, even when it’s in the wrong direction.
Faint: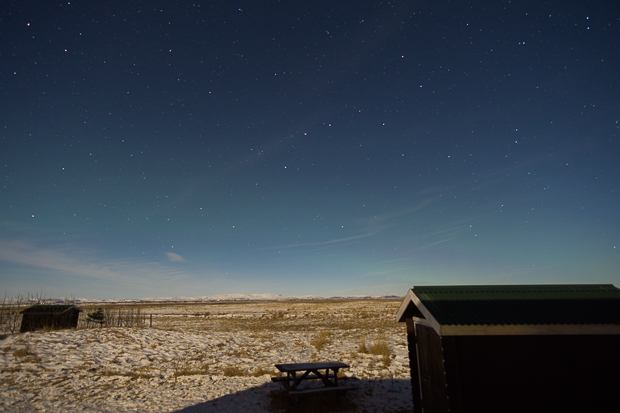
7) Learn to read the forecast
Before coming on this trip I was clueless about how aurora works, or how to “catch it”. So I decided to sit down (in a hot tub under the star-littered clear sky) and do some reading. It is actually quite straight forward. A quick google search pointed me at http://www.aurora-service.eu/ which explains how it works well.
There is this kp-index which characterizes the magnitude of geomagnetic storm. The larger the number, the more “reaching” the aurora activity is. That is, more places on earth can see the aurora.
The earth can is divided into several bands radiating from the noth pole. High latitude like North Sweden, Norway are in the band KP-1. Iceland is in the KP-2 band. The number in the band denotes how strong the kp-index needs to be in order for the lights to reach those regions.
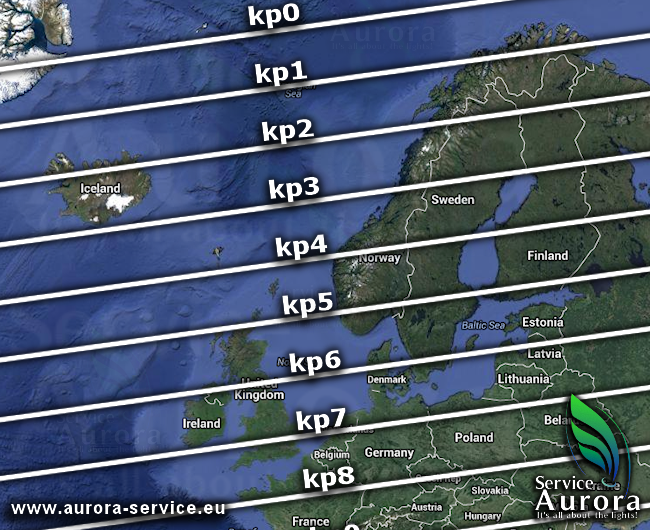
Because the earth is spherical, the bands are actually rings. That means even though the kp-index is x, it does not mean every spot in the band can see the light. It just means the aurora has the potential to reach those bands. There were times when the kp-index was high but we didn’t see anything.
There are geomagnetic storms that can cause the reading to shoot up to kp-4 or kp-5. It happened when we were there, but the cloud cover was too thick for us to see anything :( we couldn’t even see the moon light.
8) Locate north
The bands starts from the north pole, and that’s where the aurora will come from, especially if it is weaker. This will make sure when you’re hunting for a rather faint light, you are looking in the correct direction!
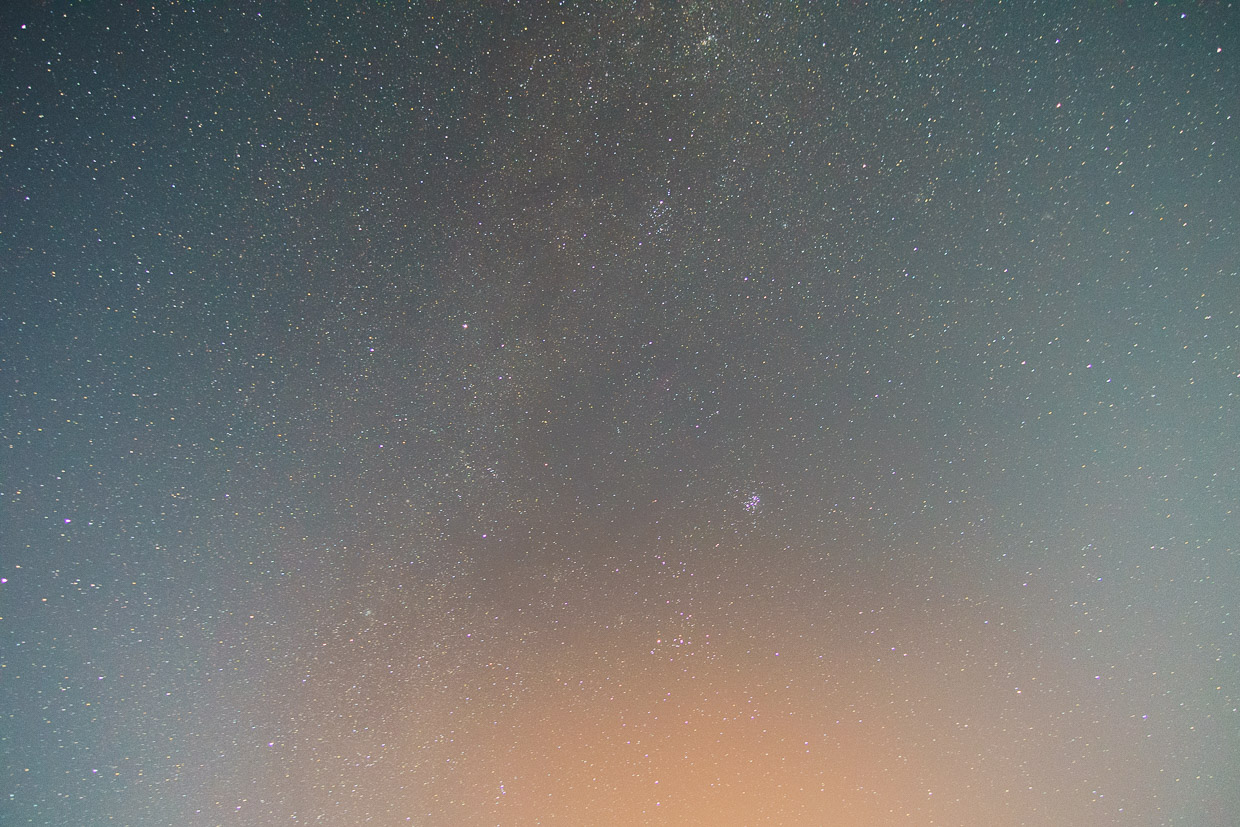
9) Lower iso is better
A high ISO is needed to capture the details of the milky way. However, the lights are easier to capture. A lower ISO will make the image less noisy.
Higher ISO: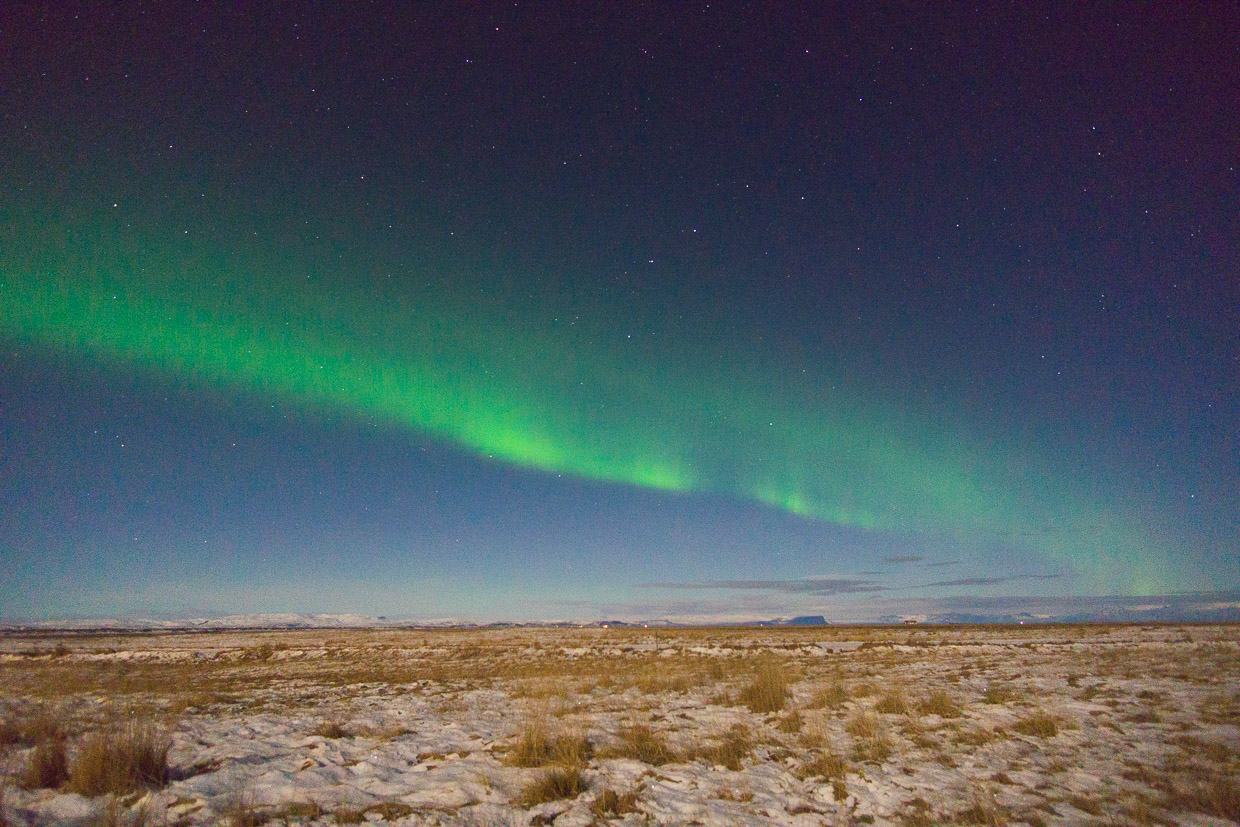

10) Camera is also OK, actually
The camera on most modern phones is sufficient to capture the aurora, but not really for the stars and milky way. If the camera shutter can be controlled (manual shutter speed), then it’s even easier. Get one of those gorilla tripod, mount the phone to somewhere stable, and take the shot!
Conclusion
To capture these natural beauty, some gears are almost necessary (e.g. wide angle lens with large aparture, tripod) and the rest is about understanding the camera settings, photo composition, post processing as well as catching the right timing.
If I could do this again, there are a few things I would have done differently.
- Learn to identify constellations so I could orientate myself with respect to the milky way core, as well as predict where it will go. This can help compose the shot. Or find an app that can help me with that.
- Plan ahead using kp-index and cloud cover forecasts.
- Use instagram to get inspiration for composition as well as nice locations to capture the shots. Find a high ground to capture more of the sky.
- Try out techniques such as light painting (e.g.) which bring foreground into the picture.
- Stitch images together to form a panaromic shot instead of just taking single shots of the sky or landscape.